Problem Set 11
Preliminaries
In your work on this assignment, make sure to abide by the collaboration policies of the course.
Don’t forget to use docstrings and to take whatever other steps are needed to create readable code.
If you have questions while working on this assignment, please come to TA help hours or post them on Piazza.
Make sure to submit your work on Gradescope, following the procedures found at the end of the assignment.
due by 10:00 p.m. on Saturday, October 7, 2023
suggested self-deadline of Friday, October 6, 2023
Important note regarding test cases and Gradescope:
-
You must test each function after you write it. Here are two ways to do so:
- Run your file after you finish a given function in the interactive window where you can call the function using different inputs and check to see that you obtain the correct outputs.
-
Add test calls to the bottom of your file, inside the
if __name__ == '__main__'control structure. For example:if __name__ == '__main__': print("mystery(6,7) returned", mystery(6,7))
These tests will be called every time that you run the file, which will save you from having to enter the tests yourself. We have given you an example of one such test in the starter file.
-
You must not leave any
printstatements in the global scope. This will cause an error with the Gradescope autograder. Make sure all of yourprintstatements are inside a function scope or inside theif __name__ == '__main__'control structure.
Problem 1: 2-D lists
30 points; pair-optional or group-of-3-optional
See the rules for working with a partner on pair-optional problems for details about how this type of collaboration must be structured.
This problem involves writing functions that create and manipulate two-dimensional lists of integers.
Getting started
Begin by downloading the following python file:
ps11pr1.py
Open that file in VS Code, and put your work for this problem in that file.
You should not move any of the files out of the ps11 folder.
In ps11pr1.py, we’ve given you two functions:
-
create_grid(height, width), which creates and returns a 2-D list of 0s with the specified dimensions. -
print_grid(grid), which prints the 2-D list specified by grid in 2-D form, with each row on its own line, and no spaces between values.Notice the statement that we use to print the value of a single cell:
print(cell, end='')
The argument
end=''indicates that Python should print nothing after the value ofcell–not a newline character (which is the default behavior), and not even a space. As a result, the values in a given row will appear right next to each other on the same line. (We can safely eliminate the spaces between values because we’re assuming that the individual cell values will be either0or1.)
Your tasks
-
To provide another example of using nested loops to manipulate a 2-D list, we’re giving you the following function, which you should copy into your
ps11pr1.pyfile:def diagonal_grid(height, width): """ creates and returns a height x width grid in which the cells on the diagonal are set to 1, and all other cells are 0. inputs: height and width are non-negative integers """ grid = create_grid(height, width) # initially all 0s for r in range(height): for c in range(width): if r == c: grid[r][c] = 1 return grid
Notice that the function first uses
create_gridto create a 2-D grid of all zeros. It then uses nested loops to set all of the cells on the diagonal–i.e., the cells whose row and column indices are the same–to1.Make sure that your copy of
diagonal_gridis working by re-running the file and trying the following:>>> grid = diagonal_grid(6, 8) >>> print_grid(grid) 10000000 01000000 00100000 00010000 00001000 00000100
-
Based on the example of
diagonal_grid, write a functioninner_grid(height, width)that creates and returns a 2-D list ofheightrows andwidthcolumns in which the “inner” cells are all1and the cells on the outer border are all0.For example:
>>> grid = inner_grid(5, 5)
>>> print_grid(grid)
00000
01110
01110
01110
00000
Hint: Modify the ranges used by your loops so that they loop over only the inner cells.
-
Write a function
random_grid(height, width)that creates and returns a 2-D list ofheightrows andwidthcolumns in which the inner cells are randomly assigned either0or1, but the cells on the outer border are all0.For example (although the actual values of the inner cells will vary):
>>> grid = random_grid(10, 10)
>>> print_grid(grid)
0000000000
0100000110
0001111100
0101011110
0000111000
0010101010
0010111010
0011010110
0110001000
0000000000
Our starter code imports Python’s
randommodule, and you should use therandom.choicefunction to randomly choose the value of each cell in the grid. Use the callrandom.choice([0, 1]), which will return either a0or a1. -
As we’ve seen in the videos, copying a list variable does not actually copy the list. To see an example of this, try the following commands from the Shell:
>>> grid1 = create_grid(2, 2)
>>> grid2 = grid1      # copy grid1 into grid2
>>> print_grid(grid2)
00
00
>>> grid1[0][0] = 1
>>> print_grid(grid1)
10
00
>>> print_grid(grid2)
10
00
Note that changing
grid1also changesgrid2! That’s because the assignmentgrid2 = grid1did not copy the list represented bygrid1; it copied the reference to the list. Thus,grid1andgrid2both refer to the same list!To avoid this problem, write a function
copy(grid)that creates and returns a deep copy ofgrid–a new, separate 2-D list that has the same dimensions and cell values asgrid. Note that you cannot just perform a full slice ongrid(e.g.,grid[:]), because you would still end up with copies of the references to the rows. Instead, you should do the following:-
Use
create_gridto create a new 2-D list with the same dimensions asgrid, and assign it to an appropriately named variable. (Don’t call your new listgrid, since that is the name of the parameter!) Remember thatlen(grid)will give you the number of rows ingrid, andlen(grid[0])will give you the number of columns. -
Use nested loops to copy the individual values from the cells of
gridinto the cells of your newly created grid. -
Make sure to return the newly created grid and not the original one!
To test that your
copyfunction is working properly, try the following examples:>>> grid1 = diagonal_grid(3, 3) >>> print_grid(grid1) 100 010 001 >>> grid2 = copy(grid1) # should get a deep copy of grid1 >>> print_grid(grid2) 100 010 001 >>> grid1[0][1] = 1 >>> print_grid(grid1) # should see an extra 1 at [0][1] 110 010 001 >>> print_grid(grid2) # should not see an extra 1 100 010 001
-
-
Write a function
invert(grid)that takes an existing 2-D list of0s and1s and inverts it – changing all0values to1, and changing all1values to0.Important notes:
-
Unlike the other functions that you wrote for this problem, this function should not create and return a new 2-D list. Rather, it should modify the internals of the existing list.
-
Unlike the other functions that you wrote for this problem, this function should not have a
returnstatement, because it doesn’t need one! That’s because its parametergridgets a copy of the reference to the original 2-D list, and thus any changes that it makes to the internals of that list will still be visible after the function returns. -
The loops in this function need to loop over all of the cells in the grid, not just the inner ones.
For example:
>>> grid = diagonal_grid(5, 5)
>>> print_grid(grid)
10000
01000
00100
00010
00001
>>> invert(grid)
>>> print_grid(grid)
01111
10111
11011
11101
11110
Here’s another example that should help to reinforce your understanding of references:
>>> grid1 = inner_grid(5, 5)
>>> print_grid(grid1)
00000
01110
01110
01110
00000
>>> grid2 = grid1
>>> grid3 = grid1[:]
>>> invert(grid1)
>>> print_grid(grid1)
11111
10001
10001
10001
11111
As you can see above, the value of
grid1has been changed. What aboutgrid2andgrid3?Before entering the statements below, see if you can predict what has happened to
grid2andgrid3. If we print them, will we see the original grid or an inverted one?Test your understanding by first entering the following:
>>> print_grid(grid2)
What do you see? Why does this make sense?
Now enter the following:
>>> print_grid(grid3)
What do you see? Why does this make sense?
(You don’t need to record your answers to these questions, but we strongly encourage you to make sure that you understand what happens here. Feel free to ask for help if you don’t understand.)
-
Problem 2: Matrix operations
30 points; pair-optional or group-of-3-optional
This problem provides additional practice with using loops to process two-dimensional lists of numbers, and with writing a program that involves repeated user interactions.
Background
The program that you will write will allow the user to perform a variety
of operations on a matrix of numbers. For the purposes of this
assignment, you can just think of a matrix as a rectangular 2-D list
of numbers. (Recall that a rectangular 2-D list is one in which
all of the rows have the same number of values.)
Getting started
In ps11pr2.py, we’ve given you some
starter code for the program. Download that file and open it in VS Code.
You’ll notice that we’ve given you the beginnings of a function
called main() that will serve as the main user-interaction loop. You will
call this function to run the program.
main() includes a variable matrix that should be used for the
2-D list of numbers, and it assigns a default 3x4 matrix of numbers
to that variable:
matrix = [[ 1,  2,  3,  4],
          [ 5,  6,  7,  8],
          [ 9, 10, 11, 12]]
You should not change this initial set of values, since we may use it for grading.
To try the program, run ps11pr2.py in VS Code, and make the following
function call from the interactive window:
>>> main()
You should see the following initial output:
[[1, 2, 3, 4], [5, 6, 7, 8], [9, 10, 11, 12]]

(0) Enter a new matrix
(1) Negate the matrix
(2) Multiply a row by a constant
(3) Add one row to another
(4) Add a multiple of one row to another
(5) Transpose the matrix
(6) Quit

Enter your choice:
Notice that main() prints the current matrix before displaying the
menu of options. This will allow the user to see the effect of each
operation after it has been performed.
We’ve also given you the code needed for options 0 and 1, and we’ve included a preliminary version of the function that prints the matrix.
If your run this code in the VS Code Interactive Window, notice that the input pops up
at the top of the window. It may be easier to run this problem in the regular terminal, putting the main() call into a test call at the end of the file.
Your tasks
-
Read over the starter code that we’ve given you. Make sure that you understand how the various functions work, and how they fit together.
-
Revise the
print_matrixfunction so that it uses nested loops to print the matrix in 2-D form. The numbers in a given column should be aligned on the right-hand side, and each number should have two digits after the decimal. For example:>>> print_matrix([[1, 2, 3], [4, 5, 6]]) 1.00 2.00 3.00 4.00 5.00 6.00
To print an individual list element, you should use the following
printstatement, which includes the necessary formatting string:print('%7.2f' % matrix[r][c], end=' ')
Note that the value of
endis a single space, not an empty string.Hint: This function is similar to the
print_gridfunction that we gave you for Problem 1. -
Add support for options 2-4 so that they perform the specified operations on the matrix.
Important notes:
-
You must implement a separate helper function for each option, and these helper functions must have the names, inputs, and behaviors that we specify below. This will allow us (and you) to test the functions on their own, outside of the larger program.
-
In addition, you must add code to the provided
main()function to call the helper functions. The code that you add should take care of getting whatever values are needed from the user, and of passing those values into the function. The functions themselves should not use theinputfunction. -
Because the code in
main()already prints the matrix after every operation, your functions should not do any printing. -
These functions will not need to return anything. This is because you will be passing a reference to the matrix into each function, and thus any changes that are made to the matrix will still be there when the function returns. See the way that we’ve implemented option 1 (negating the matrix) for an example of this approach.
The functions for options 2-4
-
For option 2, write a function
mult_row(matrix, r, m)that multiplies rowrof the specifiedmatrixby the specified multiplierm. For example:>>> matrix = [[1, 2, 3], [4, 5, 6]] >>> mult_row(matrix, 0, 10) >>> matrix [[10, 20, 30], [4, 5, 6]] >>> mult_row(matrix, 1, 0.5) >>> matrix [[10, 20, 30], [2.0, 2.5, 3.0]]
Note that
mult_rowitself is not doing any printing. Rather, we are evaluting the variablematrixfrom the Shell to see the result of calling the function.You can also use your revised
print_matrixto see the results, or–after you have added the code needed inmain()to callmult_row–you can (and should!) look at the results that are printed when you choose this option during a run of the program. However, make sure that you also test this function (and all of your other functions) from the Shell, as shown above. This will ensure that we can test the function on its own during grading. -
For option 3, write a function
add_row_into(matrix, rs, rd)that takes the specified 2-D listmatrixand adds each element of rowrs(the source row) to the corresponding element of rowrd(the destination row). For example:>>> matrix = [[1, 2, 3], [4, 5, 6], [7, 8, 9]] >>> add_row_into(matrix, 0, 2) # add row 0 into row 2 >>> matrix [[1, 2, 3], [4, 5, 6], [8, 10, 12]] >>> add_row_into(matrix, 1, 0) # add row 1 into row 0 >>> matrix [[5, 7, 9], [4, 5, 6], [8, 10, 12]]
Note that the source row is not changed. Only the destination row is.
-
For option 4, write a function
add_mult_row_into(matrix, m, rs, rd)that takes the specified 2-D listmatrixand adds each element of rowrs(the source row), multiplied bym, to the corresponding element of rowrd(the destination row). For example:>>> matrix = [[1, 2, 3], [4, 5, 6], [7, 8, 9]] >>> add_mult_row_into(matrix, 3, 0, 2) # add 3 times row 0 into row 2 >>> matrix [[1, 2, 3], [4, 5, 6], [10, 14, 18]]
Here again, the source row is not changed. Only the destination row is. You might be tempted to try to call one or more of your other functions here, but that won’t quite work! Have the function do all of the work itself.
Adding support to
main()
If you haven’t already done so, add the code needed inmainto call your functions for options 2-4.-
You will need to use the
inputfunction to get all of the necessary values from the user. If you need a reminder of how to do this, see the way that our starter code gets the user’s menu choice. Note that the multipliers needed for options 2 and 4 should be read in as floating-point values, so you will need to use thefloat()function instead of theint()function for them. -
You won’t need to print the results, because the existing code in
main()already prints the matrix at the start of each iteration of the user-interaction loop. -
See the sample run for examples of what these options should look like. In particular, make sure that you ask for the inputs for a particular option in the same order that we do in the sample run.
-
-
Finally, add support for option 5, which replaces the existing matrix with its transpose. The transpose of an n x m matrix is a new m x n matrix in which the rows of the original matrix become the columns of the new one, and vice versa.
Begin by writing a function
transpose(matrix)that takes the specified 2-D listmatrixand creates and returns a new 2-D list that is the transpose ofmatrix. The original 2-D list should not be changed.For example:
>>> matrix = [[1, 2, 3], [4, 5, 6]]
>>> print_matrix(matrix)
   1.00    2.00    3.00
   4.00    5.00    6.00

>>> transp = transpose(matrix)
>>> transp
[[1, 4], [2, 5], [3, 6]]
>>> print_matrix(transp)
   1.00    4.00
   2.00    5.00
   3.00    6.00
The function should begin by creating a new matrix with the necessary dimensions. You may want to use (and possibly adapt) one or more of the functions from Problem 1 for this purpose. If you do so, you should copy the necessary functions into
ps11pr2.py.Once the new matrix is created, iterate over its cells and set their values to the appropriate values from the original matrix.
Make sure that you return the new matrix! Because we aren’t changing the contents of the existing matrix, but rather are creating a new matrix, we need to return it so that it can be used by the caller of the function.
Once your
transposefunction is working, add code tomainto use this function for option 5. The transpose should replace the original matrix inmain, so that it can be used in subsequent operations. Replacing the existing matrix was also necessary in option 0, so you could look at how we handled that option.See the sample run for an example of the desired behavior.
Anyone taking linear algebra?
If you’re currently taking linear algebra or a similar course, you could use this program to help you on your homework!
In particular, the program supports all of the operations needed to
perform Gaussian elimination, which is a procedure that uses matrix
operations to solve a system of linear equations. You might even
want to extend the program to perform Gaussian elimination for you!
Problem 3: Images as 2-D lists
40 points; pair-optional or group-of-3-optional
Problem Set 10 included a problem in which you manipulated
PNG images using nested loops. In those problems, you used image
objects and their associated methods (e.g., get_pixel) to access
and change the underlying pixels of the image. If you
were to “look inside” one of those image objects, you would see that the
pixels are actually stored in a two-dimensional list, and that the methods
of the image object give you indirect access to that 2-D list.
In this problem, we will bypass the use of image objects and work
directly with 2-D lists!
Getting started
Begin by downloading the following zip file:
ps11image.zip
Unzip this archive, and you should find a folder named ps11image,
and within it several files, including ps11pr3.py. Open that file
in VS Code, and put your work for this problem in that file.
You should not move any of the files out of the ps11image folder.
Keeping everything together will ensure that your functions are able to
make use of the image-processing module that we’ve provided.
Loading and saving pixels
At the top of ps11pr3.py, we’ve included an import statement for
the hmcpng module, which was developed at Harvey Mudd College.
This module gives you access to the following two functions that
you will need for this problem:
-
load_pixels(filename), which takes as input a stringfilenamethat specifies the name of a PNG image file, and that returns a 2-D list containing the pixels for that image -
save_pixels(pixels, filename), which takes a 2-D listpixelscontaining the pixels for an image and saves the corresponding PNG image to disk using the specifiedfilename(a string).
In addition, we’ve given you a function create_uniform_image(height,
width, pixel) that creates and returns a 2-D list of pixels with
height rows and width columns in which all of the pixels have the
RGB values given by pixel. Because all of the pixels will have the
same color values, the resulting grid of pixels will produce an image
with a uniform color – i.e., a solid block of that color.
Your tasks
-
Write a function
blank_image(height, width)that creates and returns a 2-D list of pixels withheightrows andwidthcolumns in which all of the pixels are green (i.e., have RGB values[0,255,0]). This function will be very easy to write if you take advantage of thecreate_uniform_imagefunction that we’ve provided!To test your function, re-run the file and enter the following from the Shell:
>>> pixels = blank_image(100, 50)
>>> save_pixels(pixels, 'blank.png')
blank.png saved.
Here’s what
blank.pngshould look like:

-
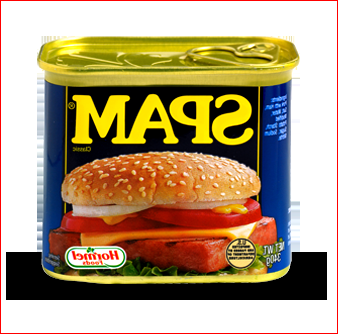
Write a function
flip_horiz(pixels)that takes the 2-D listpixelscontaining pixels for an image, and that creates and returns a new 2-D list of pixels for an image in which the original image is “flipped” horizontally. In other words, the left of the original image should now be on the right, and the right should now be on the left. For example, if you do the following:>>> pixels = load_pixels('spam.png') >>> flipped = flip_horiz(pixels) >>> save_pixels(flipped, 'fliph_spam.png') fliph_spam.png saved.
you should obtain the following image:
This function will be similar to the
flip_vertfunction that you wrote in Problem Set 9, but it will flip the image horizontally instead of vertically. In addition, there are several other key differences:-
It should take a 2-D list of pixels rather than a filename.
-
It does not need to load or save the image, because you will be doing that separately using the
load_pixelsandsave_pixelsfunctions. -
It will manipulate the 2-D list of pixels, rather than an image object.
-
It should return the new 2-D list of pixels that it creates.
Your function will need to create a new 2-D list of pixels with the same dimensions as
pixels, and you can use yourblank_imagefunction for that purpose. -
-
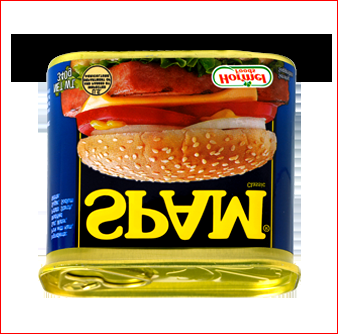
Write a function
flip_vert(pixels)that takes the 2-D listpixelscontaining pixels for an image, and that creates and returns a new 2-D list of pixels for an image in which the original image is “flipped” vertically. In other words, the top of the original image should now be on the bottom, and the bottom should now be on the top. For example, if you do the following:>>> pixels = load_pixels('spam.png') >>> flipped = flip_vert(pixels) >>> save_pixels(flipped, 'flipv_spam.png') flipv_spam.png saved.
you should obtain the following image:
This function will be similar to the
flip_horizfunction that you wrote in Problem Set 9, but it will flip the image vertically instead of horizontally. In addition, there are several other key differences:-
It should take a 2-D list of pixels rather than a filename.
-
It does not need to load or save the image, because you will be doing that separately using the
load_pixelsandsave_pixelsfunctions. -
It will manipulate the 2-D list of pixels, rather than an image object.
-
It should return the new 2-D list of pixels that it creates.
Your function will need to create a new 2-D list of pixels with the same dimensions as
pixels, and you can use yourblank_imagefunction for that purpose. -
-
Write a function
transpose(pixels)that takes the 2-D listpixelscontaining pixels for an image, and that creates and returns a new 2-D list that is the transpose ofpixels.You should start by copy-and-pasting your
transposefunction from [Problem 3][pr3] intops11pr3.py. The only real change that you need to make to your earlier function is to change the helper function that gets called to create the new 2-D list. Make this version oftransposecall yourblank_imagefunction to create the new 2-D list. We also recommend changing the name of the variablematrixtopixels, but doing so is not essential.Here’s one way to test your new version of
transpose:>>> pixels = load_pixels('spam.png') >>> transp = transpose(pixels) >>> save_pixels(transp, 'transp_spam.png') transp_spam.png saved.
This is the image you should obtain:

-
Write two more functions, both of which should take a 2-D list
pixelscontaining pixels for an image, and create and return a new 2-D list of pixels for an image that is a rotation of the original image:-
rotate_clockwise(pixels)should rotate the original image clockwise by 90 degrees. For example:

-
rotate_counterclockwise(pixels)should rotate the original image counterclockwise by 90 degrees. For example:

Both of these functions can be implemented very simply by taking advantage of the other functions that you have already written! In each case, think about how a sequence of two or more transformations of the original image could be used to produce the desired transformation.
-
Submitting Your Work
You should use Gradesope to submit the following files:
- your
ps11pr1.pyfile containing your solutions for Problem 1 - your
ps11pr2.pyfile containing your solutions for Problem 2 - your
ps11pr3.pyfile containing your solutions for Problem 3
Warnings
-
Make sure to use these exact file names, or Gradescope will not accept your files. If Gradescope reports that a file does not have the correct name, you should rename the file using the name listed in the assignment or on the Gradescope upload page.
-
If you make any last-minute changes to one of your Python files (e.g., adding additional comments), you should run the file in VS Code after you make the changes to ensure that it still runs correctly. Even seemingly minor changes can cause your code to become unrunnable.
-
If you submit an unrunnable file, Gradescope will accept your file, but it will not be able to auto-grade it. If time permits, you are strongly encouraged to fix your file and resubmit. Otherwise, your code will fail most if not all of our tests.